If you’re spending hours every week uploading Reels one by one, it’s time for a serious glow-up in your Instagram marketing game. Whether you’re a content creator, small business owner, or social media manager, learning how to bulk schedule Instagram Reels is a total game-changer.
Not only does it save you loads of time, but it also helps boost your Instagram reach, engagement, and consistency. Plus, with the right tools and strategies, you can plan your Instagram content calendar like a pro, without pulling your hair out.
In this guide, we’ll walk you through everything about how to schedule Reels on Instagram from PC, what to do if scheduled Reels on Instagram are not showing. And lastly, the best ways to schedule Reels for free, from Android or desktop.
This post is packed with tips and tools to help you crush your Instagram content strategy.
Can You Bulk Schedule Reels? (And Why You Should)
Yes. You can bulk schedule Instagram Reels, and you absolutely should if you’re serious about growth and engagement.
Why it Matters:
- Stay consistent with your content calendar
- Maximize your audience reach during peak times
- Save time with social media automation
- Easily collaborate with your team
Bulk scheduling isn’t just convenient; it’s a game-changer for anyone serious about Instagram marketing.
Can You Schedule Reels on Instagram Desktop?
Yes, with the right tools. While the native Instagram app offers limited scheduling options, tools like Meta Business Suite, SocialBu, Later, and Hootsuite allow you to schedule Reels on Instagram desktop with ease.
This is especially useful for creators and teams who manage content on a PC.
How to Schedule Reels on Instagram from PC
Here’s how to schedule your Reels from your computer:
Using Meta Business Suite
- Log in to Meta Business Suite.
- Navigate to Content > Create Post > Instagram Reel.
- Upload your video content.
- Add captions, hashtags, and schedule the time.
- Click “Schedule”.
This works well for business and creator accounts, but has some limitations.
How to Bulk Schedule Instagram Reels on Business Account
Want to simplify your Instagram content strategy and save time?
Here’s how you can bulk schedule Instagram Reels, ideal for creators and brands using Instagram business tools or creator tools. Follow these easy steps to streamline your Instagram content planning and maximize engagement.
Step-by-Step Guide to Schedule Instagram Reels:
Follow this step-by-step guide to bulk schedule Instagram reels and make posting easier and hassle-free.
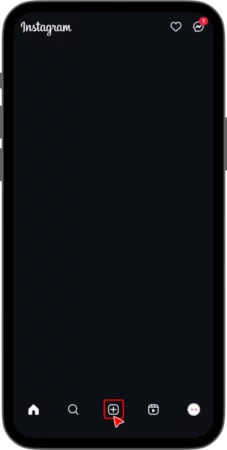
Step 1
Click on the “+” icon at the bottom of your Instagram app.
Step 2
Select “Reel” from the available options.
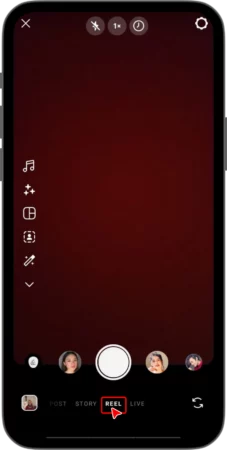
Step 3
Upload the video you want to schedule.
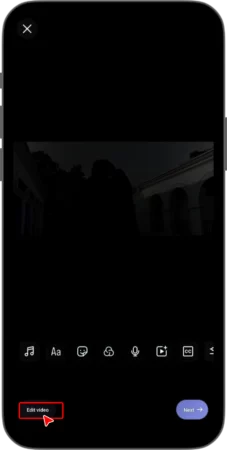
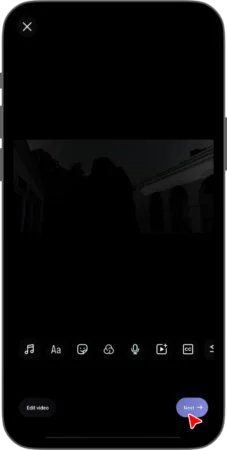
Click on “Edit video” and make your edits. Add music, text, voiceover, captions, or effects. Tap “Next” once you’re done editing.
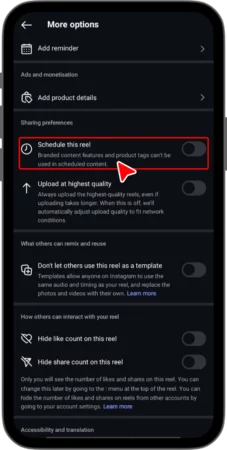
Write your caption, tag people, add a location, and adjust your audience settings. Scroll down and tap on “More Options.”
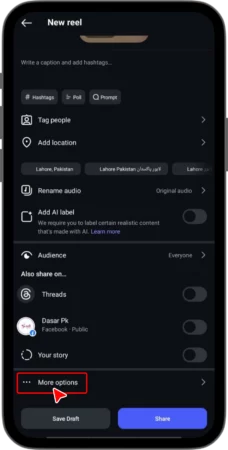
Select the option “Schedule this reel.”
Select your preferred date and time for publication.
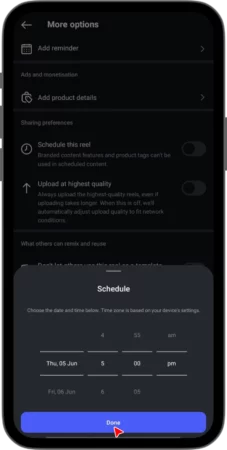
Tap “Done.”
Once you are done, click on the ‘Share’, and Tadaaaa.

Your Instagram Reel is scheduled and ready to go.
Pro Tip: Instagram Reel size must be under 90 seconds to be eligible for scheduling on some platforms.
How to Bulk Schedule Instagram Reels for Maximum Reach (Step-by-Step)
If you’re looking to bulk schedule Instagram Reels for maximum reach, streamline your content creation workflow, and boost engagement, you’re in the right place. Here’s a step-by-step guide using SocialBu, a powerful tool for social media scheduling, including Instagram reels and story scheduling.
Whether you’re a content creator, social media manager, or a small business owner, this guide will help you schedule Reels on Instagram from PC, Android, or any device efficiently.
Step 1: Create a SocialBu Account and Link Your Instagram
First, sign up at SocialBu, a reliable social media automation platform. Connect your Instagram business account or creator account for full access to post-scheduling features like Reels, Stories, and Feed posts.
Step 2: Go to the Publish Section
Click on the Publish tab from the dashboard.
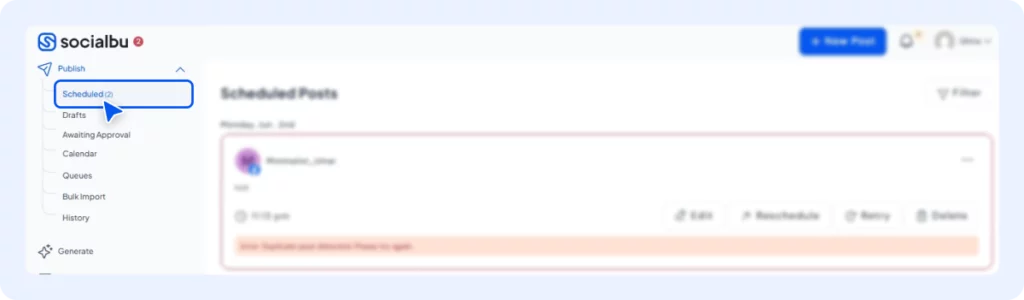
Select the Schedule option.
Step 3: Create a New Post
Click on ‘New Post’.

Select the Instagram account(s) you want to schedule for.
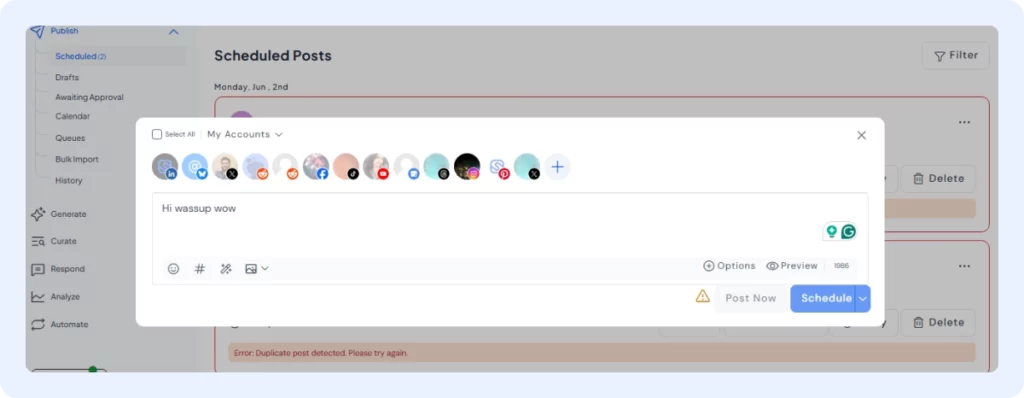
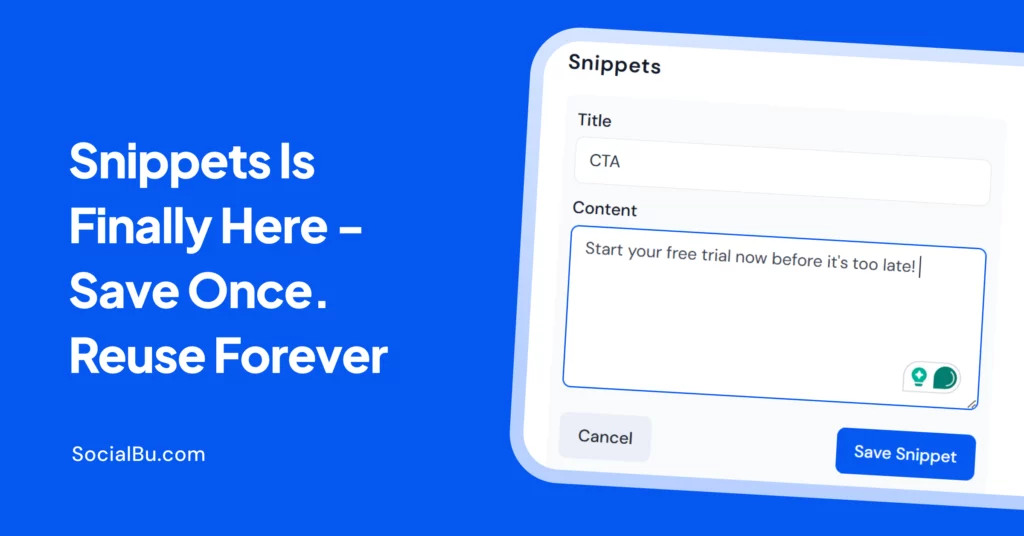
Write your caption, insert emojis, use hashtags strategically, and even use AI-assisted caption writing for optimized engagement.
Pro Tip: Use trending or niche-specific hashtags to increase your Instagram reach and visibility.
Step 4: Attach Your Reel & Customize Settings
Upload your Instagram Reel (video).
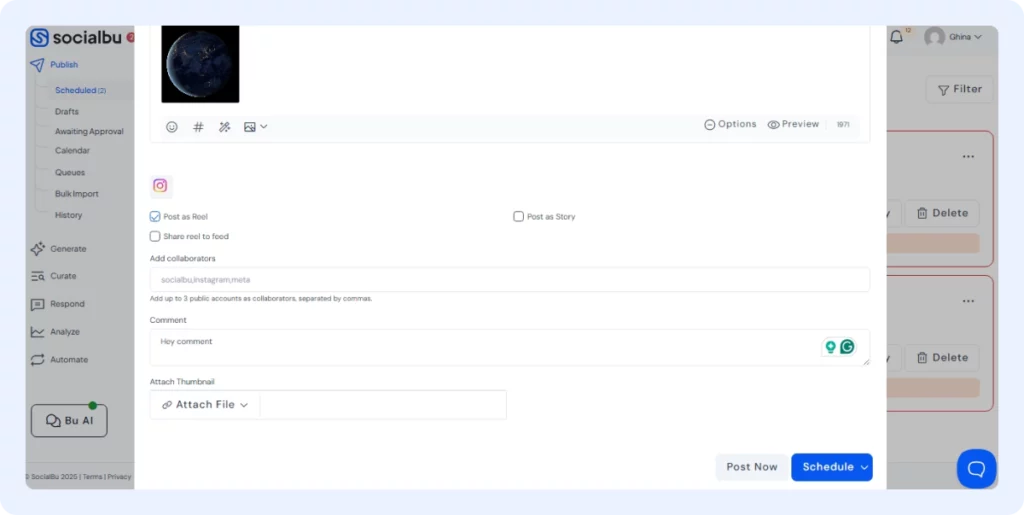
Preview your post to check how it will look on your feed.
Click on options, and choose: Post type: Reel, Story, or Feed.
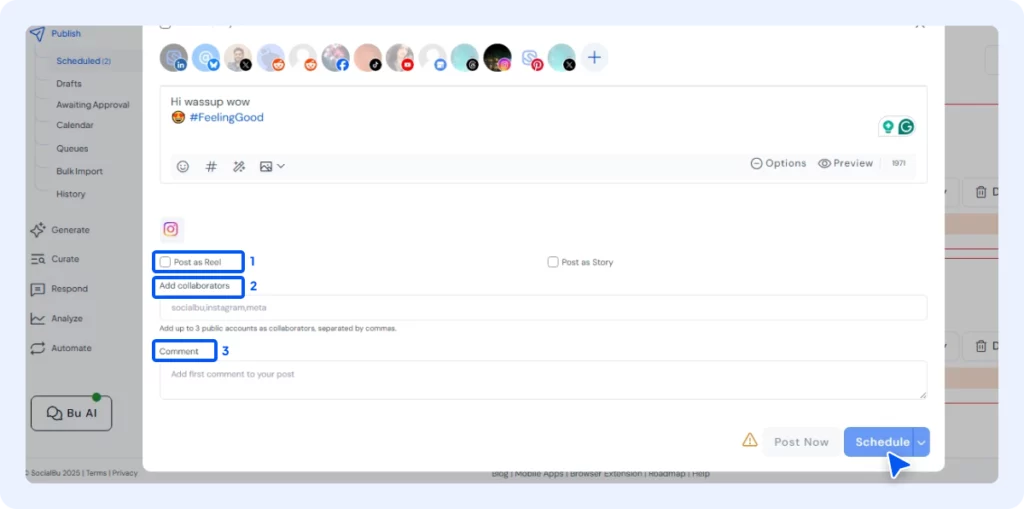
Add collaborators for co-posting. Set custom publishing times based on your audience’s peak activity hours (use Instagram insights for data).
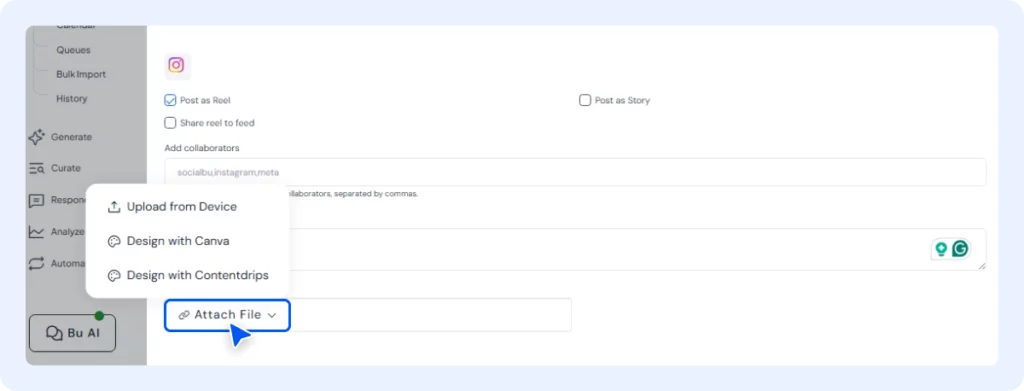
If you want to attach a thumbnail, click on the ‘Attach File’ and upload any image from your device or design directly from Canva.
Step 5: Schedule Your Instagram Reel
Once your content is ready:
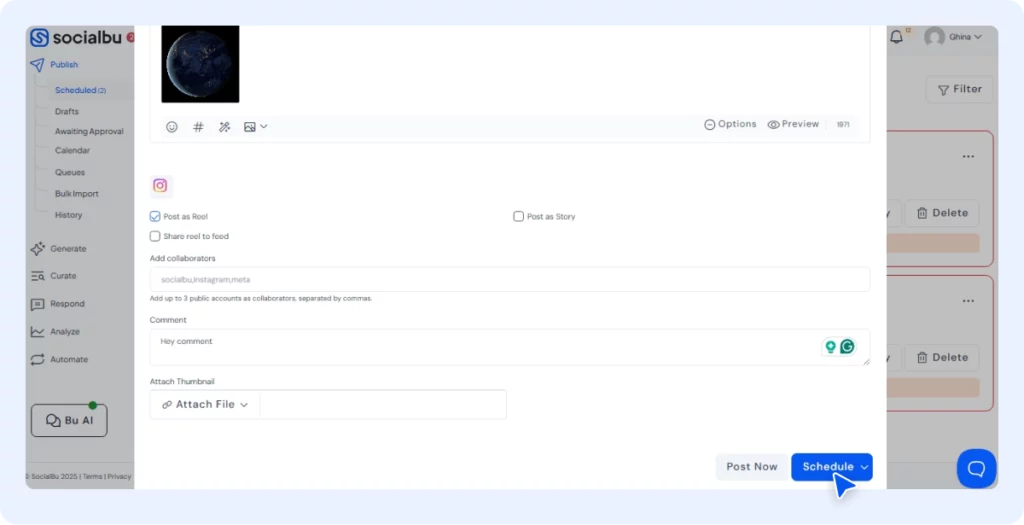
Click on ‘Schedule’. Choose the ‘Date and Time’ to schedule your post, then click on ‘Schedule’ and just like that, it’s done.
Your Reel will now be queued and published automatically at the time you chose.
Why SocialBu?
It offers seamless bulk Instagram reel scheduling, social media automation, and analytics, making it ideal for brands and creators.
Pro Tips to Maximize Reach with Scheduled Reels
- Use trending audio (and add it during upload if the platform allows)
- Post when your audience is most active (check Instagram insights or test with different times to find the best time to post reels)
- Optimize captions and hashtags with keywords
- Include calls-to-action (e.g., “Save this for later!”)
- Test different formats, tutorials, behind-the-scenes, and product showcases.
How to See and Edit Scheduled Reels
Depending on the platform:
- Meta Business Suite: Go to “Scheduled Posts”
- SocialBu: Navigate to the “Queue” or “Calendar” view. Edit the time, caption, or even delete and replace before posting.
If “schedule reels on Instagram not showing”, ensure you’re using a business or creator account and that the platform is connected properly.
Tool Comparison: Best Platforms to Bulk Schedule Instagram Reels
To help you pick the right tool for your needs, here’s a quick comparison of the top platforms for Instagram video scheduling and content planning:
Platform | Features | Price | Team Collaboration | Analytics |
SocialBu | Bulk scheduling, automation, calendar view | Affordable | Yes | In-depth |
Hootsuite | Scheduling, Team workflows | Expensive | Yes | Advanced |
Later | Drag-and-drop calendar, visual planner | Free tier available | Yes | Good |
Meta Business Suite | Native and free | Free | Yes | Limited Tools |
Buffer | Multi-platform support | Mid-tier | Yes | Basic |
SocialBu vs Hootsuite for Bulk Reels
- SocialBu is ideal for solo creators, small teams, and individuals seeking affordable yet powerful tools.
- Hootsuite excels at enterprise-level management but is pricier.
Meta Business Suite vs Later: Which Works Best?
- Meta Business Suite is ideal for free, native scheduling, but lacks certain features.
- Later is user-friendly, offers visual planning, and is great for Instagram-first brands.
Final Thoughts
If you’re serious about Instagram content planning and maximizing engagement, it’s time to bulk schedule Instagram Reels. Whether you’re working from a PC, an Android device, or using a business account, there are tools to make it easy and effective.
Platforms like SocialBu make social media automation easy. You can schedule weeks of video content, track Instagram analytics, and boost Instagram engagement without the stress. So, start scheduling smarter today and take control of your Instagram video scheduling. Your next viral Reel is just a click away.
Don’t just post, post with purpose.
Start Your Free Trial on SocialBu Today!
FAQs
Q: How to bulk schedule Instagram Reels for maximum reach free?
Use SocialBu’s free plan or Meta Business Suite for basic free scheduling. Focus on trending audio, strong captions, and ideal posting times.
Q: How to bulk schedule Instagram Reels for maximum reach on Android?
Use SocialBu from your Android browser or try Later’s mobile app. Ensure your account is set to business or creator.
- Open your browser on Android (e.g., Chrome).
- Go to SocialBu.com and log in or sign up.
- Connect your Instagram business or creator account.
- From the dashboard, tap on “Publish”.
- Tap “New Post”.
- Select your Instagram account.
- Upload your Reel (ensure it’s under 90 seconds).
- Write your caption, add hashtags, and set a thumbnail.
- Tap “Schedule”, then choose your preferred date and time.
Repeat for multiple Reels to bulk schedule them.
Q: How to schedule Reels on Instagram from PC?
Use Meta Business Suite or tools like Hootsuite or SocialBu. These platforms offer Instagram video scheduling directly from a desktop.
- Go to Meta Business Suite.
- Log in with your Facebook account connected to your Instagram.
- Click “Content” in the sidebar.
- Click “Create Post” and select Instagram Reel.
- Upload your video (under 90 seconds)
- Add your caption, hashtags, and location.
- Click More Options > Select “Schedule”.
Q: Why schedule Reels on Instagram not showing?
Ensure:
- You have a business/creator account
- Reels are under 90 seconds
- You’ve updated your app/platform
Q: How to schedule Reels on Instagram for free?
Use Meta Business Suite for native, free scheduling. For better automation, SocialBu and Later offer limited free plans.
Q: How to schedule Reels on Instagram business account?
Use the Meta Business Suite or a scheduler like SocialBu. These support Instagram content planning, especially for businesses.
Q: Can you schedule Reels on Instagram desktop?
Yes. Use Meta Business Suite, Later, Hootsuite, or SocialBu to schedule Reels on Instagram desktop.
Q: How to schedule Reels on Instagram Meta Business Suite?
- Log in to Meta Business Suite
- Click Create Post > Instagram Reel
- Add content, caption, and time
- Hit Schedule.