Curved text can add a touch of sophistication and elegance to your designs, making them stand out from the crowd. You can create a sense of movement and flow by curving your text, drawing the viewer’s eye through your design.
This can be especially effective in social media graphics, where you want to quickly grab the viewer’s attention. Whether you’re creating social media graphics, posters, or invitations, knowing how to curve text can elevate your designs.
This quick guide will show you how to curve text in Canva, a popular graphic design platform.
What is Curved Text?
Curved text refers to text bent or wrapped around a curve or shape rather than being displayed in a straight line. This design technique allows you to integrate text with visual elements, making it a popular choice for logos, badges, and various promotional materials.
You can create more dynamic and engaging designs that draw attention and enhance visual appeal by curving your text.
Why Curve Text in Canva?
Curving text in Canva is a powerful design tool that allows for greater creative flexibility and visual appeal in your projects. By bending text along a curve or circular path, you can create eye-catching designs that stand out and add a unique touch to your graphics.
This feature is handy for crafting logos, badges, and promotional materials where standard text arrangements might fall short. Curved text can help your designs conform to specific shapes or align with other visual elements, enhancing overall coherence and aesthetic appeal. It adds a dynamic element to your design, making it more engaging and memorable.
Additionally, curved text can help improve readability and emphasis in your designs. For instance, when used in circular text around a logo or product image, curved text ensures that important information is seamlessly integrated into the visual flow, making it more noticeable and readable.
Designing Promotional Materials
Curved text on promotional materials such as event invitations, posters, or flyers can draw attention to key details and enhance the visual appeal. It’s an effective way to highlight important information while maintaining an aesthetically pleasing design.
Step-by-Step Guide: How to Curve Text in Canva
Here’s the step-by-step guide to curve text in Canva.
Step 1: Select the Text Tool
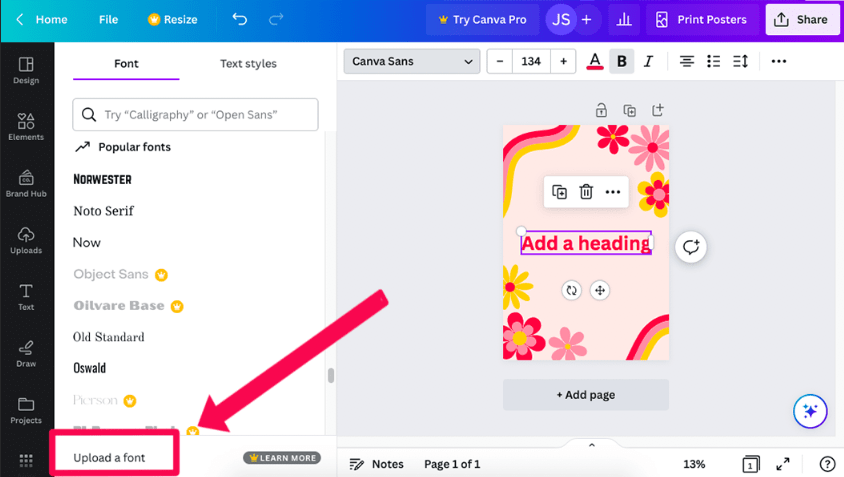
To get started, select the Text Tool from the Canva toolbar. You can choose from different text types, like heading, subheading, or body text.
Step 2: Select Your Text
Type the text you want to curve. Choose a font that’s easy to read and suitable for your design.
Step 3: Curve the Text

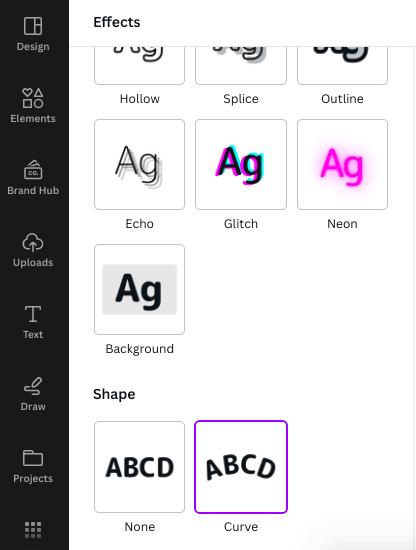
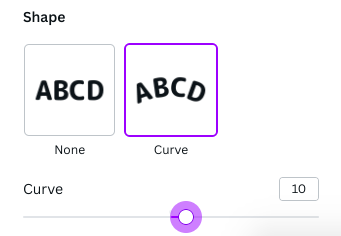
Click on the “Curve” option in the text editor. Adjust the curve settings to your liking. You can play with the radius, angle, and other settings to get your desired look.
Step 4: Customize and Refine

Customize your curved text by adjusting the color, size, and alignment. Refine the curve by tweaking the handles and other settings.
Tips and Variations:
- Experiment with different fonts and font sizes to create unique effects.
- Try curving text in different directions, like circular or wavy text.
- Use curved text to create visually appealing headings or titles.
Tips for Creating Stunning Curved Text Designs
Here are some tips for creating great curved designs.
- Font Selection: Choose a font that complements the curve. Some fonts work better than others when curved.
- Color Coordination: Ensure the text color harmonizes with the overall design.
- Experiment with Angles: Try different curve angles to find the perfect fit for your project.
- Combine with Other Elements: Use curved text with other design elements, such as shapes or images, for a visually interesting composition.
Using Canva’s Text Effects
Canva provides an easy-to-use text effect tool that allows you to curve text with just a few clicks. By selecting the text you want to curve, you can access various effects that let you adjust the curvature to fit your design needs.
Experiment with different curves and shapes to find the one that best complements your design.
Adjusting Curvature and Positioning
Once you apply the curve effect, fine-tune the curvature and positioning of your text to ensure it fits perfectly within your design.
Canva allows you to adjust the curve’s intensity and direction, giving you control over how the text wraps around shapes or lines. This precision helps in achieving a balanced and visually appealing result.
Leveraging SocialBu for Social Media Success
SocialBu is a powerful tool designed to streamline social media management and boost online presence. Its features allow users to save time, increase efficiency, and achieve better results.
Let’s explore how SocialBu can elevate your social media game.
Features and Benefits
- Bulk Uploading: Efficiently schedule multiple posts at once to save time.
- Strategic Content Planning: Develop a content calendar using SocialBu to distribute your case study content across different platforms and maximize its reach.
- Targeted Audience Reach: Utilize SocialBu’s analytics to identify your target audience and tailor your case study content accordingly.
- Automation: Set up actions based on specific triggers (e.g., like, comment, share) to save time and increase efficiency.
- Monitor and Engage: Use SocialBu’s listening tools to track comments, shares, and mentions of your case study. Respond promptly to build relationships.
- Measure and Analyze: Use SocialBu’s analytics to track the performance of your case study campaign and identify areas for improvement.
Conclusion
By following these straightforward steps and incorporating the tips outlined above, you can effortlessly create stunning curved text designs in Canva that enhance the visual appeal of your projects.
Curving text adds a unique and dynamic element to your designs and helps you integrate text seamlessly with other visual components, such as shapes and images. This technique is ideal for crafting eye-catching logos, engaging promotional materials, and creative social media graphics.
Remember, the key to mastering curved text lies in experimentation and practice. Don’t be afraid to try different fonts, sizes, and curvature settings to see what works best for your design.
The flexibility of Canva’s text effects allows you to tailor your text to fit various shapes and styles, giving you the freedom to create truly personalized and professional designs. Embrace the design process as an opportunity to explore new ideas and refine your skills; curved text can become a powerful tool in your design toolkit.
FAQs
Is there a way to curve text in Canva?
Yes, you can curve text in Canva using the “Curve” option in the text editor.
How do I put text in a curve?
Select the text, click “Curve” in the text editor, and adjust the curve settings.
How to warp text in Canva?
Use the “Curve” option in the text editor to warp text in Canva.
How do I curve a page in Canva?
You can’t curve a page in Canva, but can curve text and shapes.
How do I reshape a text box in Canva?
Click on the text box, then click and drag the corners or edges to reshape it.
How do I align text to a shape in Canva?
Select the text, click “Align” in the top toolbar, and select “Align to shape.”


